
Introduction and Overview
This article includes setup with technical and configuration instructions. The Medcart Marketplace is engineered by Marketplacer; some of the setup steps in Omnivore are customised and differ from other mainstream markets.
Before you begin please be aware of the following points:
- To sell on the Medcart Marketplace using Marketplacer there must be an active and approved selling account. To confirm please check with the onboarding team at the Medcart Marketplace.
- If this is already in place the setup in Omnivore can begin.
- Retrieve the API Key from the Medcart Marketplacer team.
- With these points in mind setup in Omnivore can continue.
Setup & Configuration
- Note, the steps below include: Adding The Marketplace - Refreshing Brand & Categories - All fields on the Settings - General Page in Omnivore. Steps 1-13 have to be completed first and in that order.
- Add the Medcart Marketplace into the Omnivore instance. To do this navigate to the Settings, Marketplaces page in Omnivore, select Create Link and Config.

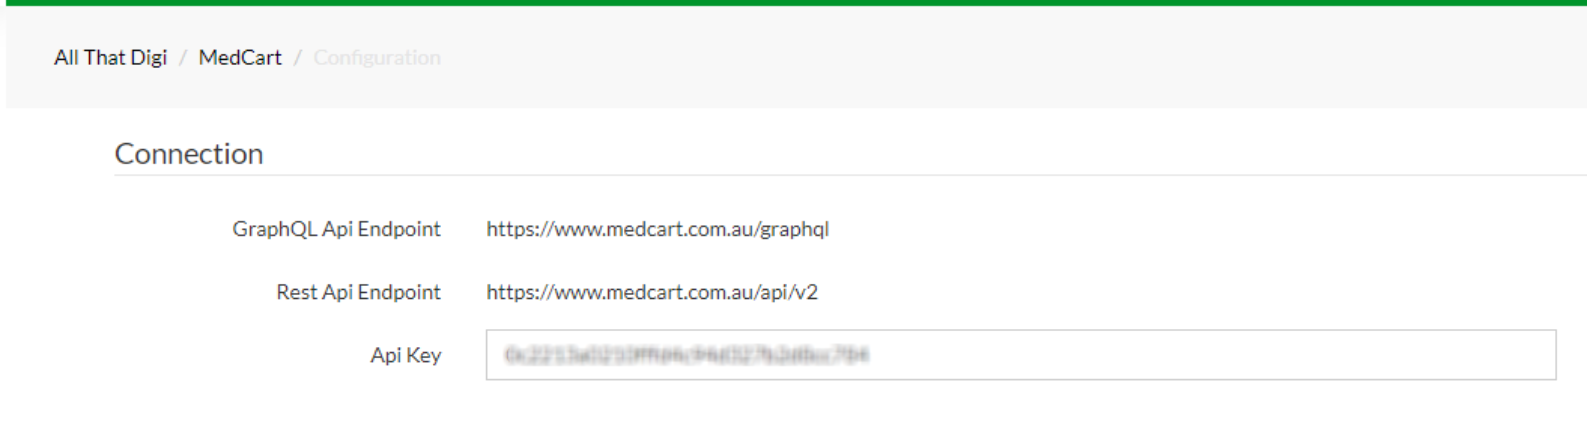
- When the market has been added, you will see the Medcart Marketplace in Omnivore. Click Settings > Medcart Marketplace > General to view the Connection and Advanced Settings section.
- On that page, add the API Key Credentials retrieved from step 3 above.
- Scroll down and click Update and Check Connection.
- Navigate to Retailer Admin > New Dashboard, scroll down to the Marketplacer Rest API section, where you'll see the link 'Download Brands - create/update Marketplace Brands'. Click the link.
- The process can take several minutes to complete, so if nothing appears to change on the screen, give it time.
- When the job is complete it will display something like this - done, active brands = 992.
- Navigate to Marketplace Admin > Marketplaces > View Brands to check that the brands have been imported for that new retailer you just added. For more required Brand Settings for Medcart, see Brand Setup below.
- While on that page, click Refresh Categories against Medcart.
- Go back to Settings > Medcart > General and copy and paste the following ID into the Seller GraphQL ID field. For Medcart this ID is the same for every seller - U2VsbGVyLTg1MzQ=
- Before proceeding, click Update and Check Connection.
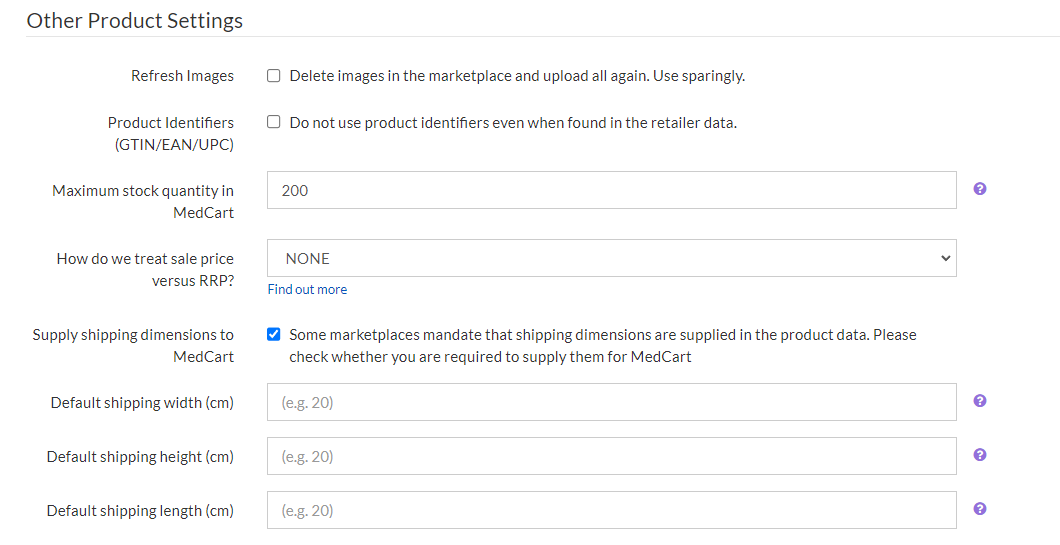
- Omnivore will supply specific dimensions for Shipping Setup - 'Supply shipping dimensions to Medcart Market' can be ticked if needed - see this article for more instructions.
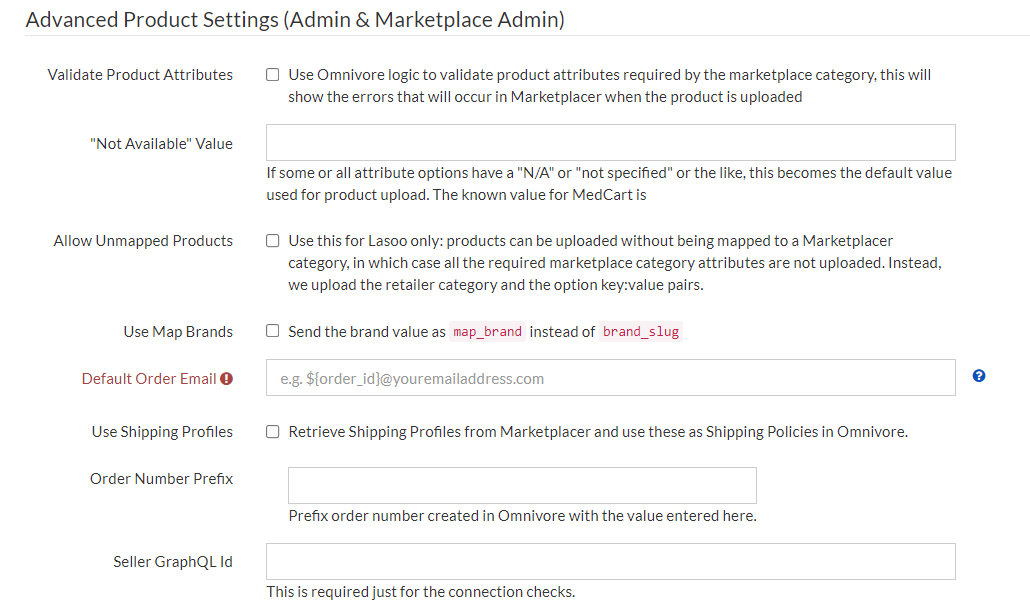
- Tick the 'Validate Product Attributes' check box if it is not ticked as part of the config.
- Insert N/A into the Not Available Value field.
- The Use Map Brands check box can be left unticked
- Default Order Email, please read this FAQ to determine if you need this or not.
- Shipping Profiles. If you are using shipping from the marketplace, tick the 'Use Shipping Policies' box - follow this article for next steps.
- Prefix Order Number, see full explanation below under the heading 'Órder Settings' below.
- Click Update to save your changes.
- If necessary, run an import from the dashboard to import all products from the retailer's eCommerce Store. If there are other marketplaces already active in Omnivore you don't need to do this step.
- At this stage, you are connected to the Medcart Marketplacer Operator in setup mode so product feeds and syncing have not started yet.
Summary of Settings
- Product Identifiers: If ticked, we will not send UPC or Barcode data to the market.
- Max Stock Quantity: Used to define the max stock quantity we will push to the market.
- Validate Product Attributes: Must be ticked for Medcart Marketplace.
- Use Map Brands: See Brand Section below.
- Use Shipping Profiles: More information on Shipping Setup below.
- Prefix Order Number: This must be entered. This will insert the prefix supplied at the beginning of each order number.
- Use GraphQL: obtain the seller GRAPHQL id from the Medcart Marketplacer Team.
Important: Any changes made to the Advanced Product Settings have to be saved by clicking Update at the bottom of the page. During the setup phase a marketplace category refresh within Omnivore must also be completed (part of steps 10 and 11 above).
Required Checklist
Decide Which Products to List
- Omnivore has the function to block and Exclude Products from listing. This means you can pick and choose what to list by blocking and unblocking products.
- For more information on Blocking and Excluding click here.
Shipping Setup
There are two options for Shipping Setup:
Shipping Profiles from the Marketplace OR Shipping Policies set up with Omnivore.
Follow this article for the setup options.
Brand Options
There are two brand options, which are Map Brand OR Brand Slug (default)
Map Brands: If 'send the value as Map Brands' is ticked in Omnivore this means the retailer brand we send to the Marketplace has to be mapped on the Marketplace side.
OR
Brand Slug: This is the default brand setting. In this case, we send a brand list to the marketplace. Once that brand list is in the marketplace database, we reimport the brand list and match it to the brands we have in Omnivore.
Order Settings
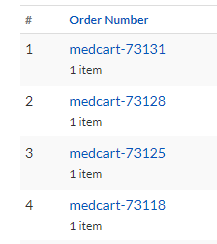
Within Omnivore, go to Settings - Medcart Market - General. The field called 'Prefix Order Number' must have a value entered. Whatever value is added into this field must also have a - on the end e.g. medcart - will prefix the order number with that value so your order reference number will be formatted like this example: " medcart-73131 ".
Category Mapping
- To successfully list a product, it must be mapped to a Medcart Marketplace Category. The Category Mapping process in Omnivore is the same for all marketplaces.
- For more information on Category Mapping in Omnivore click here.
Product Identifiers
- thatThis includes GTINs, UPC and EAN; the general rule is product identifiers are required is defined by the marketplace. Omnivore imports product identifiers from the eCommerce Store. If the data is not required, we do have functions to not send that type of data. For Marketplacer Markets this setting is on Settings - Medcart Marketplace - General - Product Identifiers.
Start Selling
- While setting up Medcart Marketplace in Omnivore the integration is in Setup Mode. This means that feeds, syncs and uploads have NOT commenced yet. As you complete the many setup steps, Omnivore will automatically reveal the Start Selling button on the Dashboard. In order for you to go live on the Marketplace, you must hit Start Selling. There are checks and tests that we recommend before Start Selling is activated.
Required Reading
Please read this article written by our Development Team