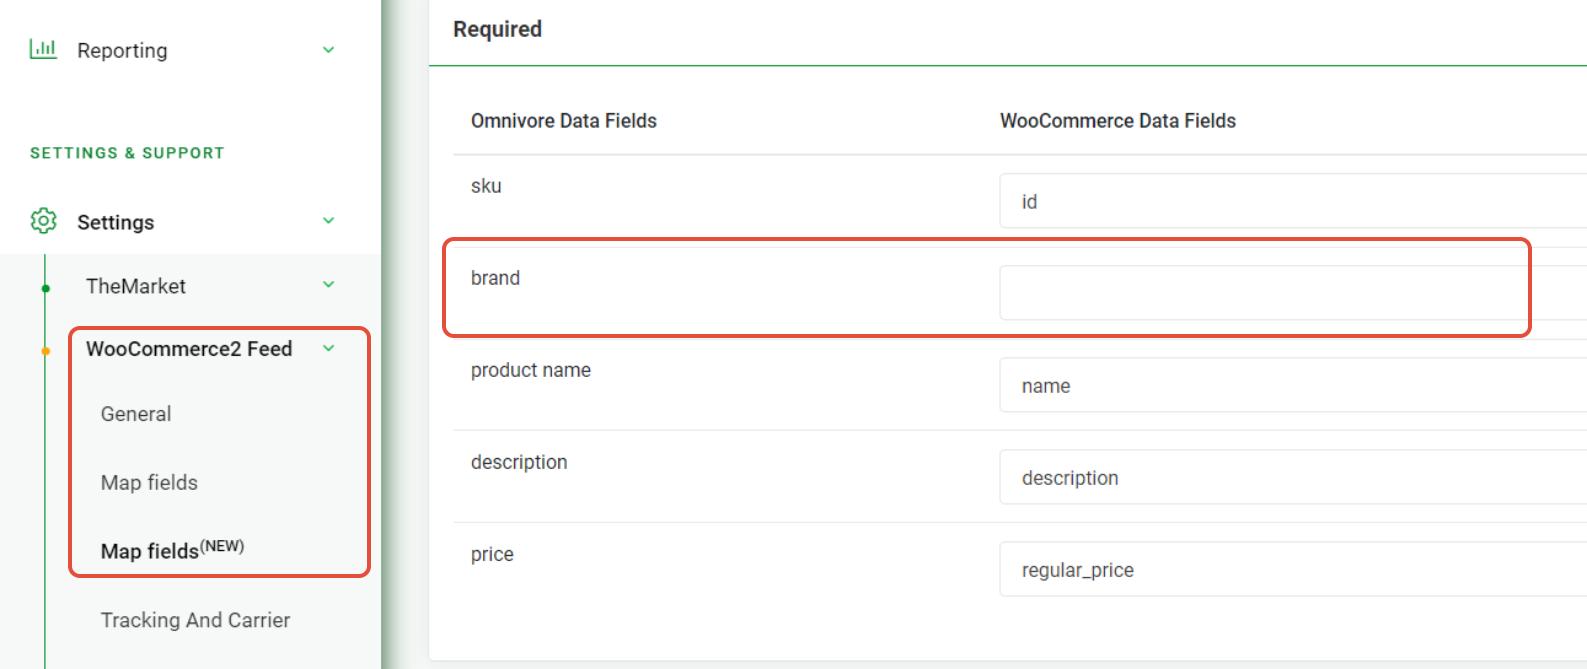
Overview
About the Brand Attribute Field on WooCommerce
How to change the Brand Attribute Field
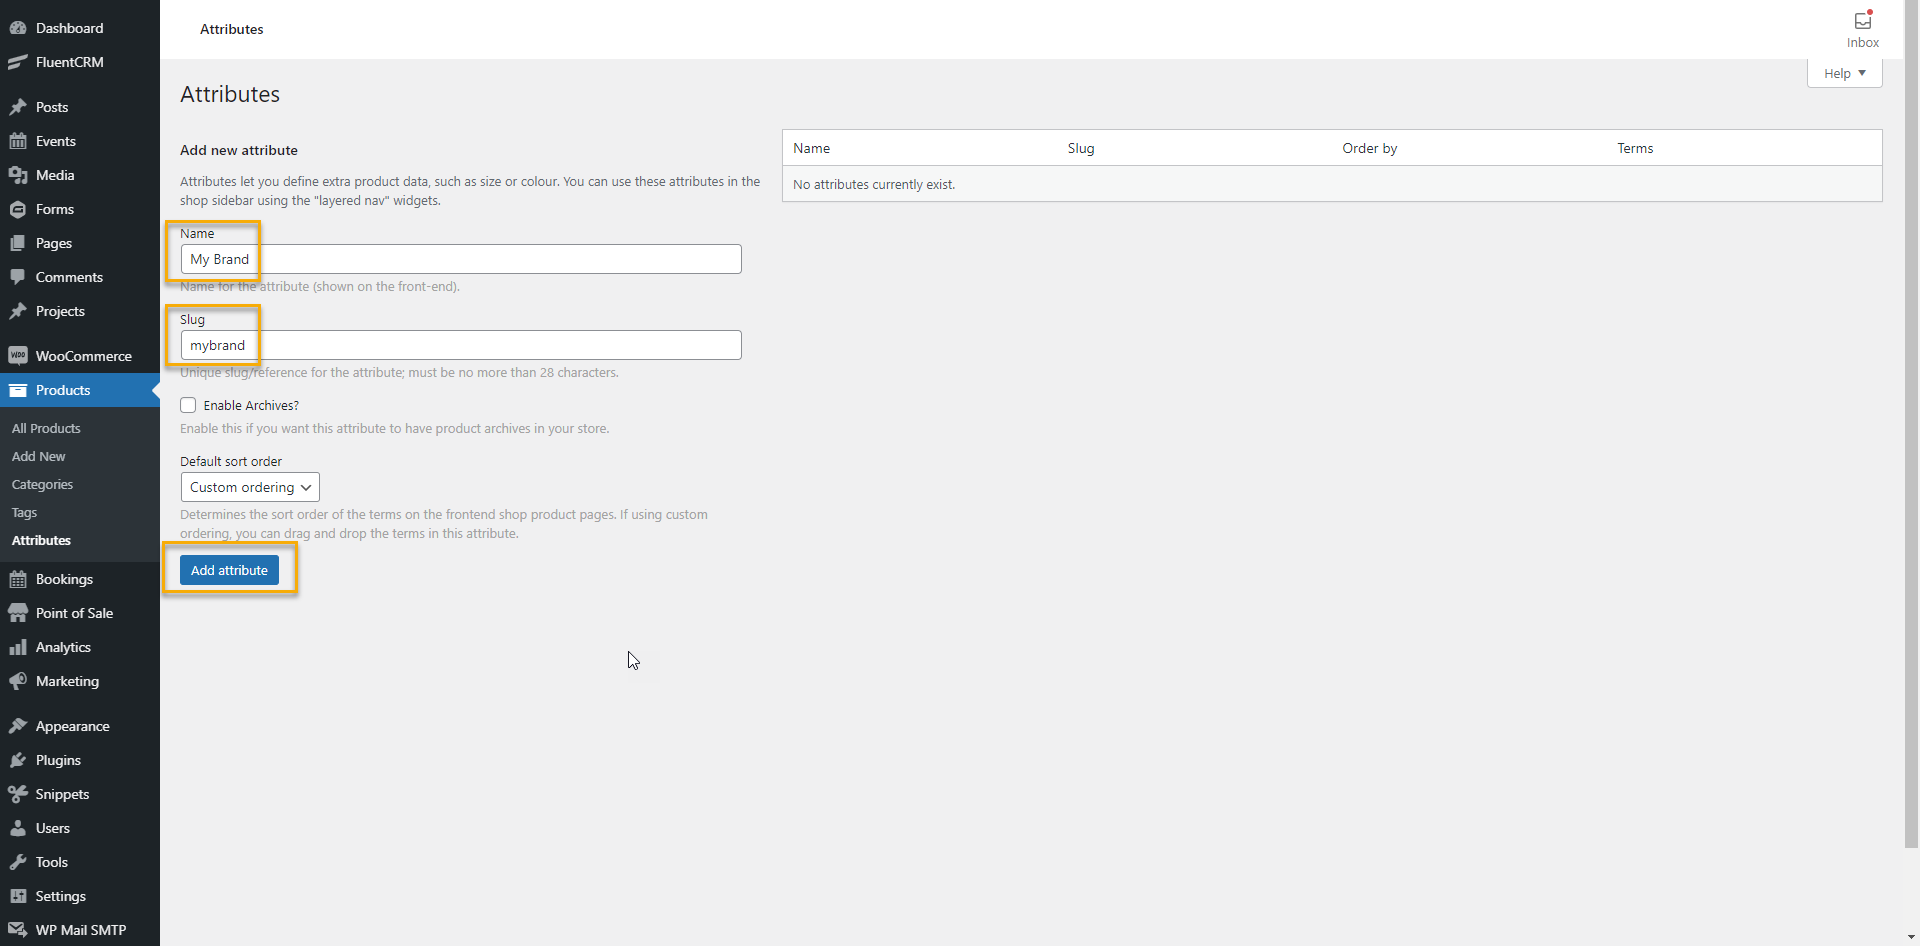
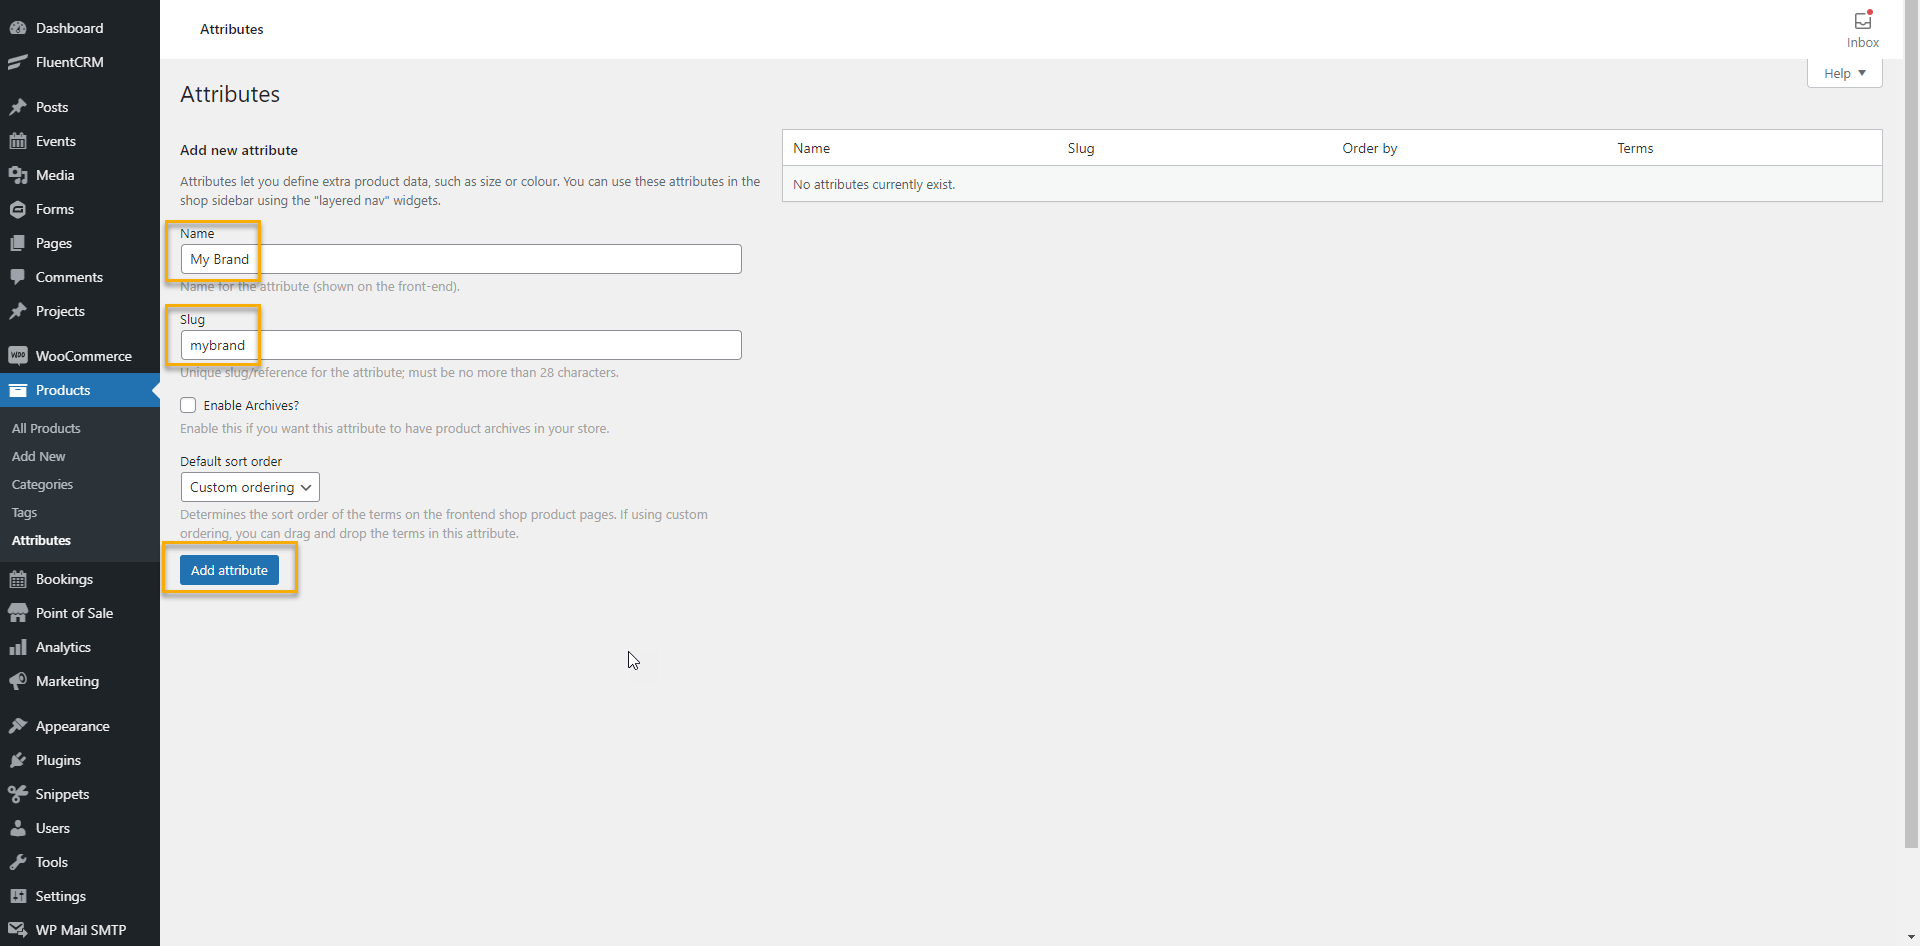
- Go to the Products menu item, then select Attributes. The attributes screen opens.
- Add the Name and the Slug of the attribute in the designated fields. In this example we have used 'My Brand' but you can use anything you like, just 'Brand' is usually enough.
-
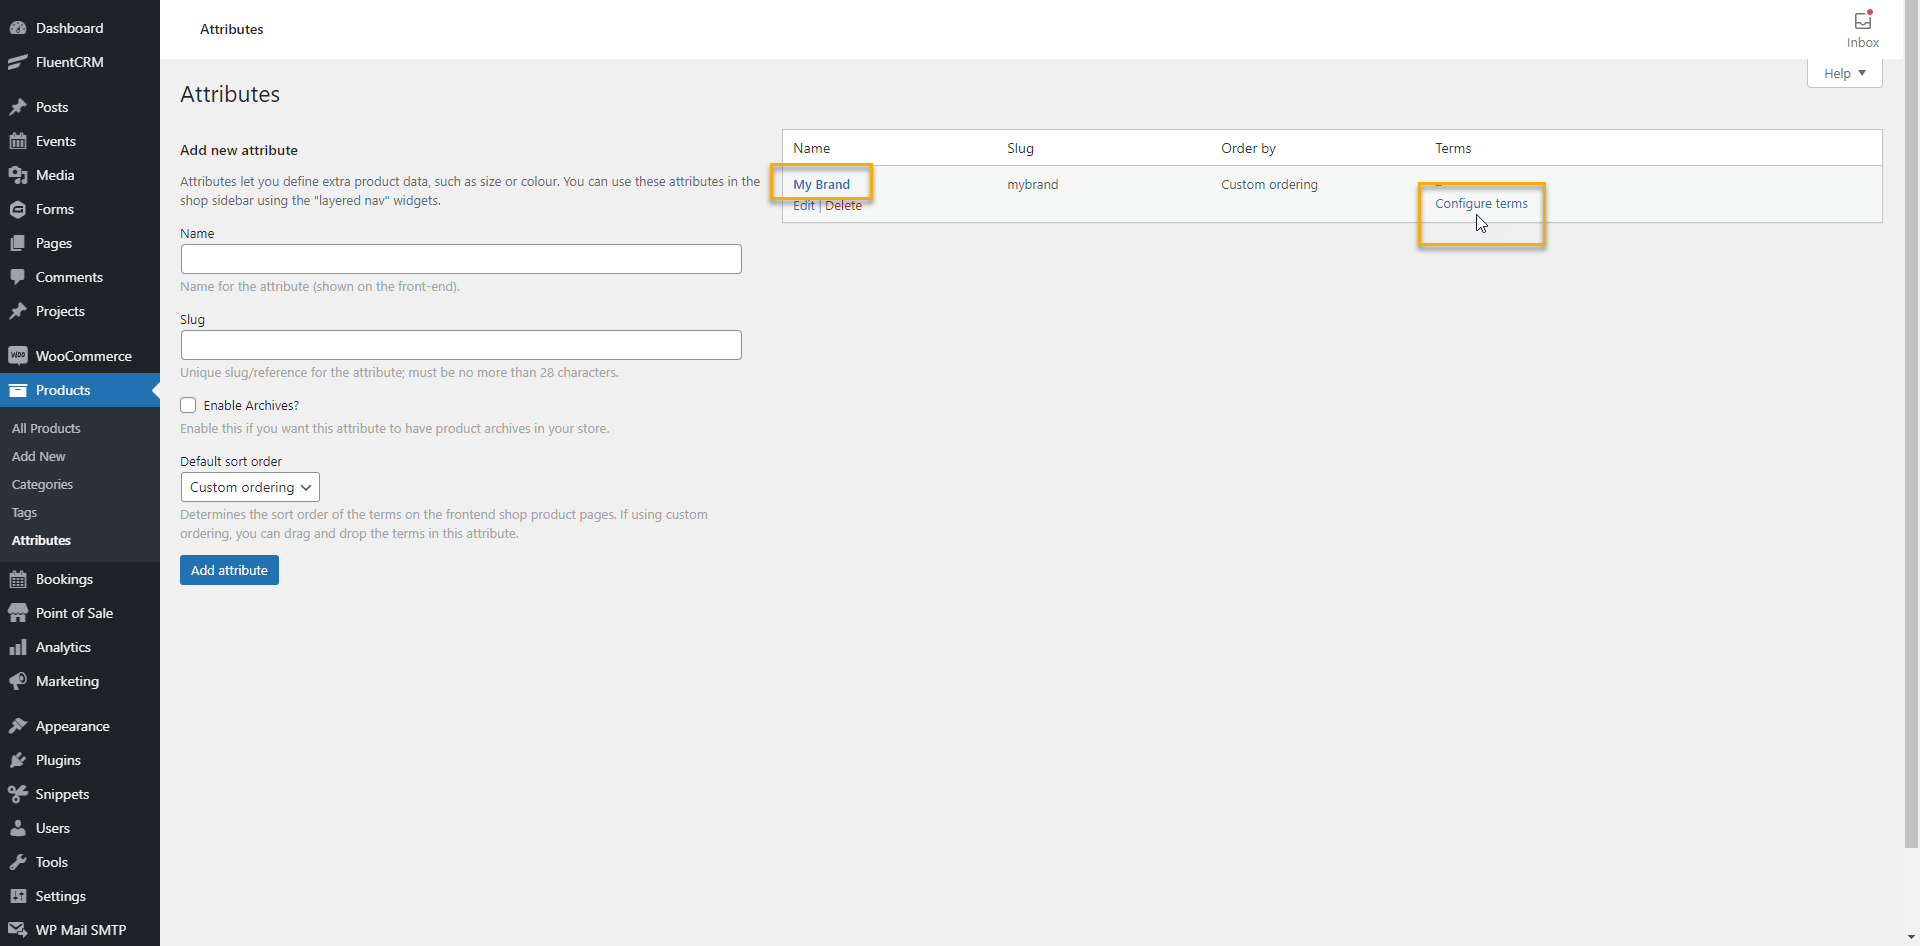
Then click Add Attribute and you will see the new attribute appear in the list on the right.
-
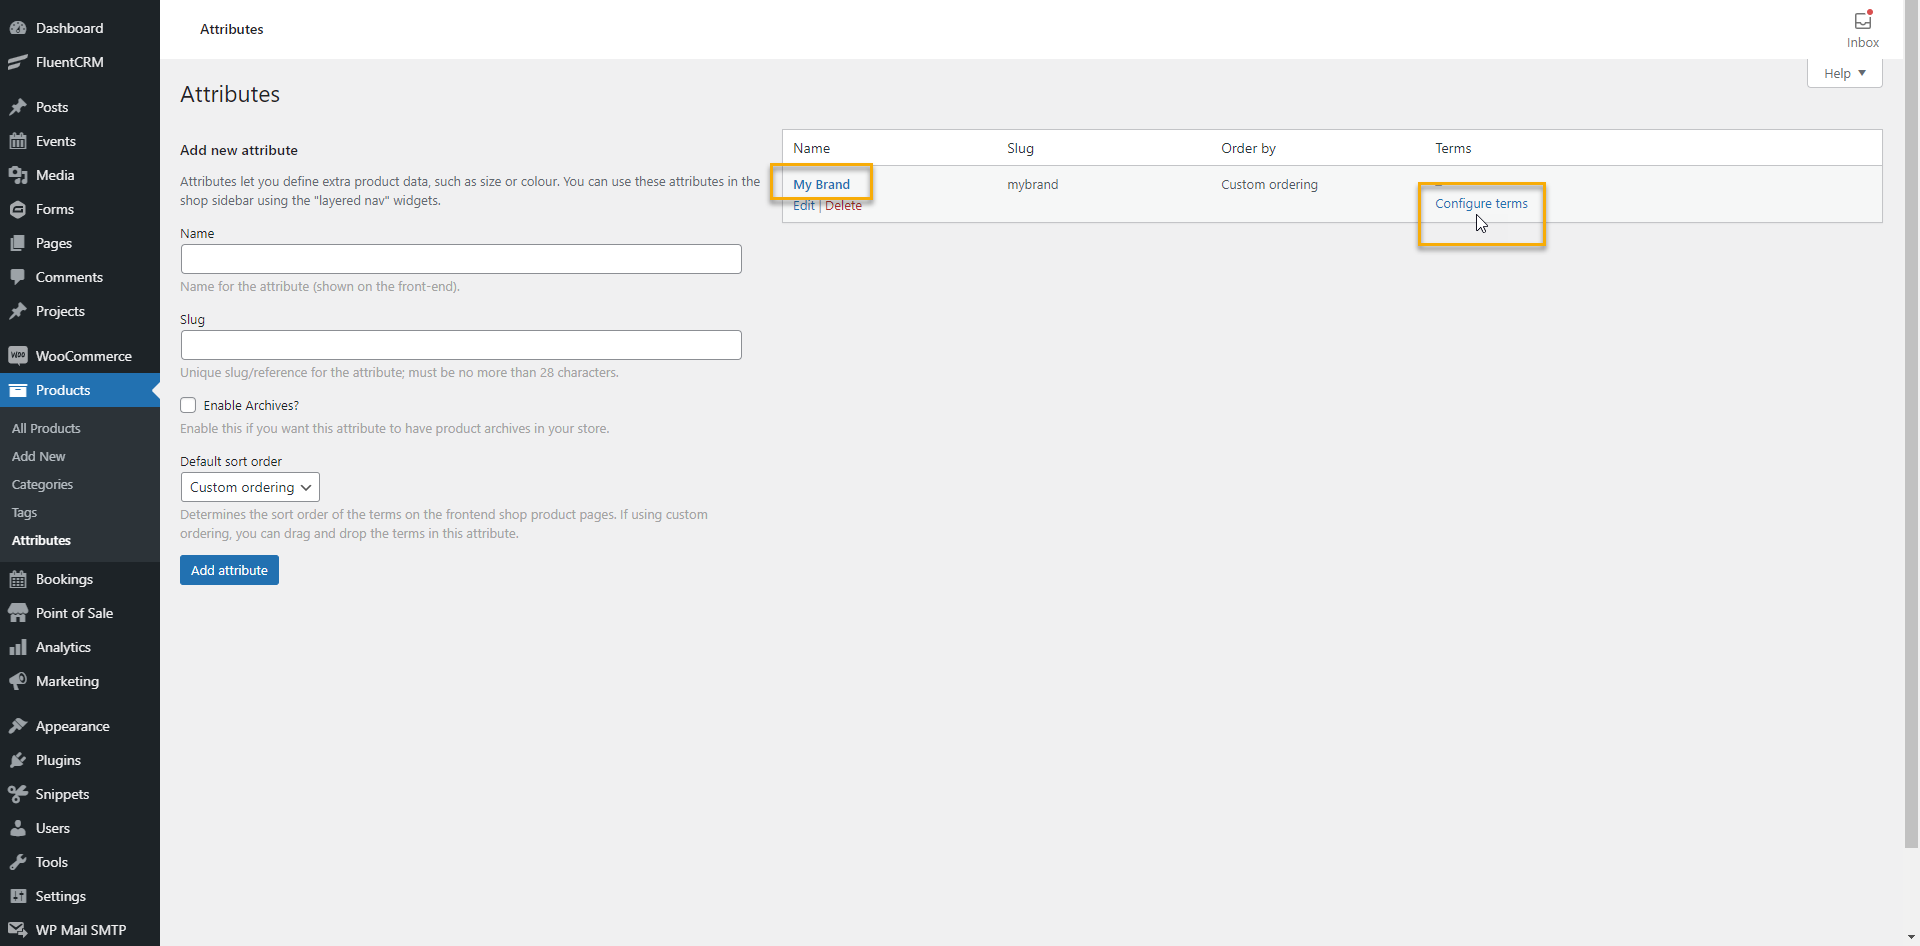
Next, click the Configure terms link. A new screen will open. You can add the terms of the attribute there. More precisely, you can add the names of the brands you feature on your site.
-
On the next screen add the terms to the Brand attribute. Add the Name, Slug, and Description to the Brand attribute. In this example, we have entered 'Special Brand Name' as our brand. Your brand names will be the respective brands associated with your products. Then click Add New Brand.
-
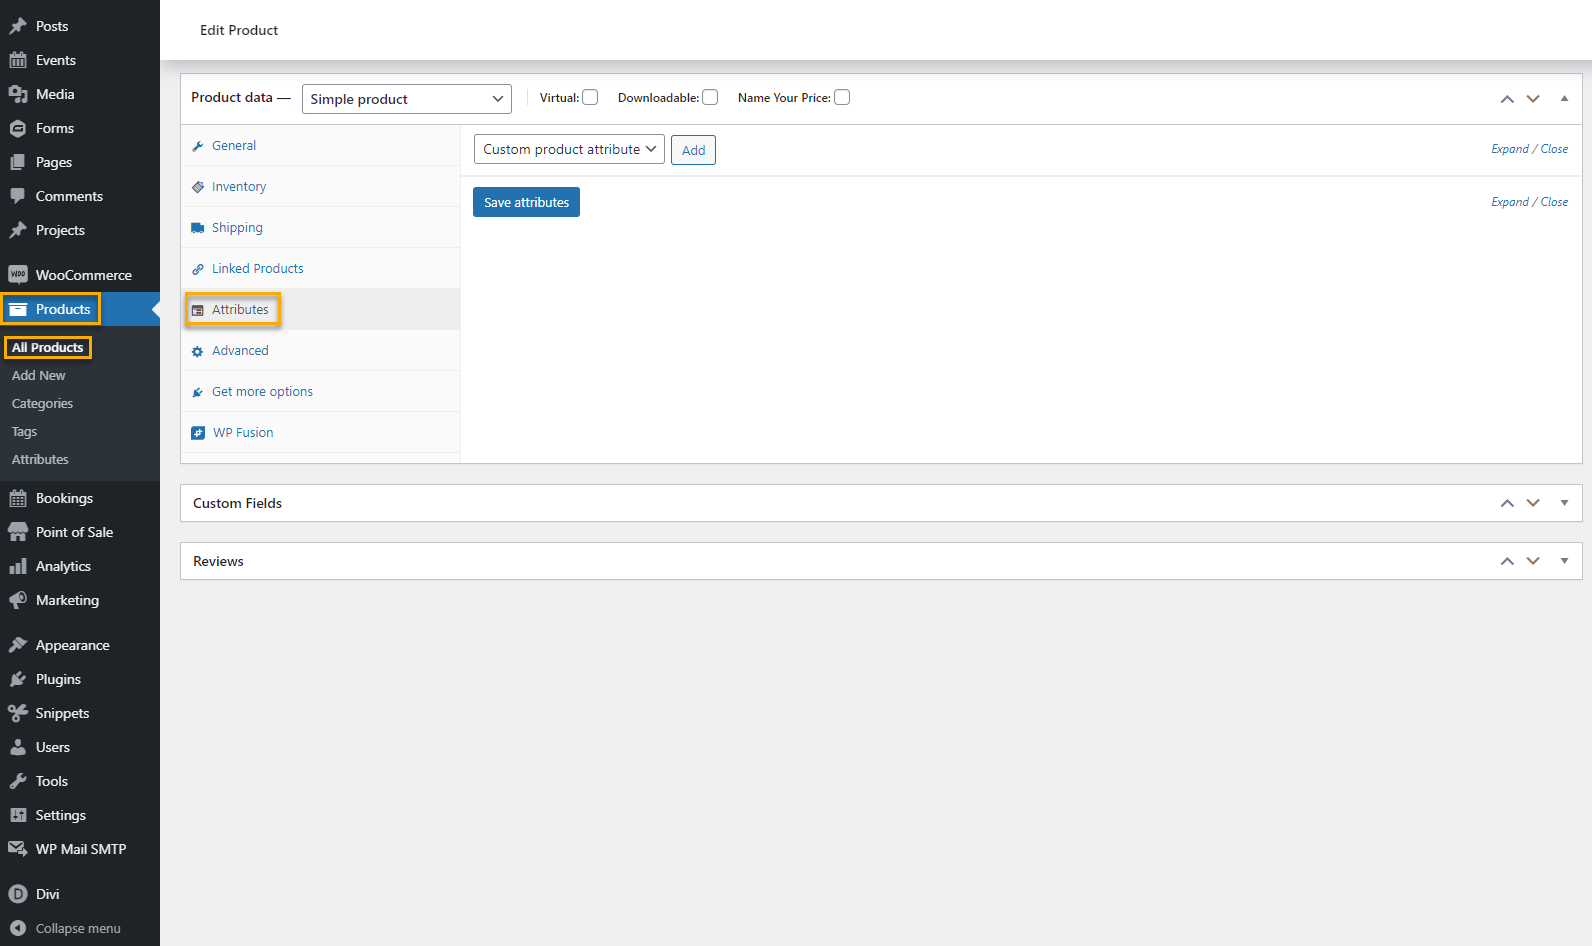
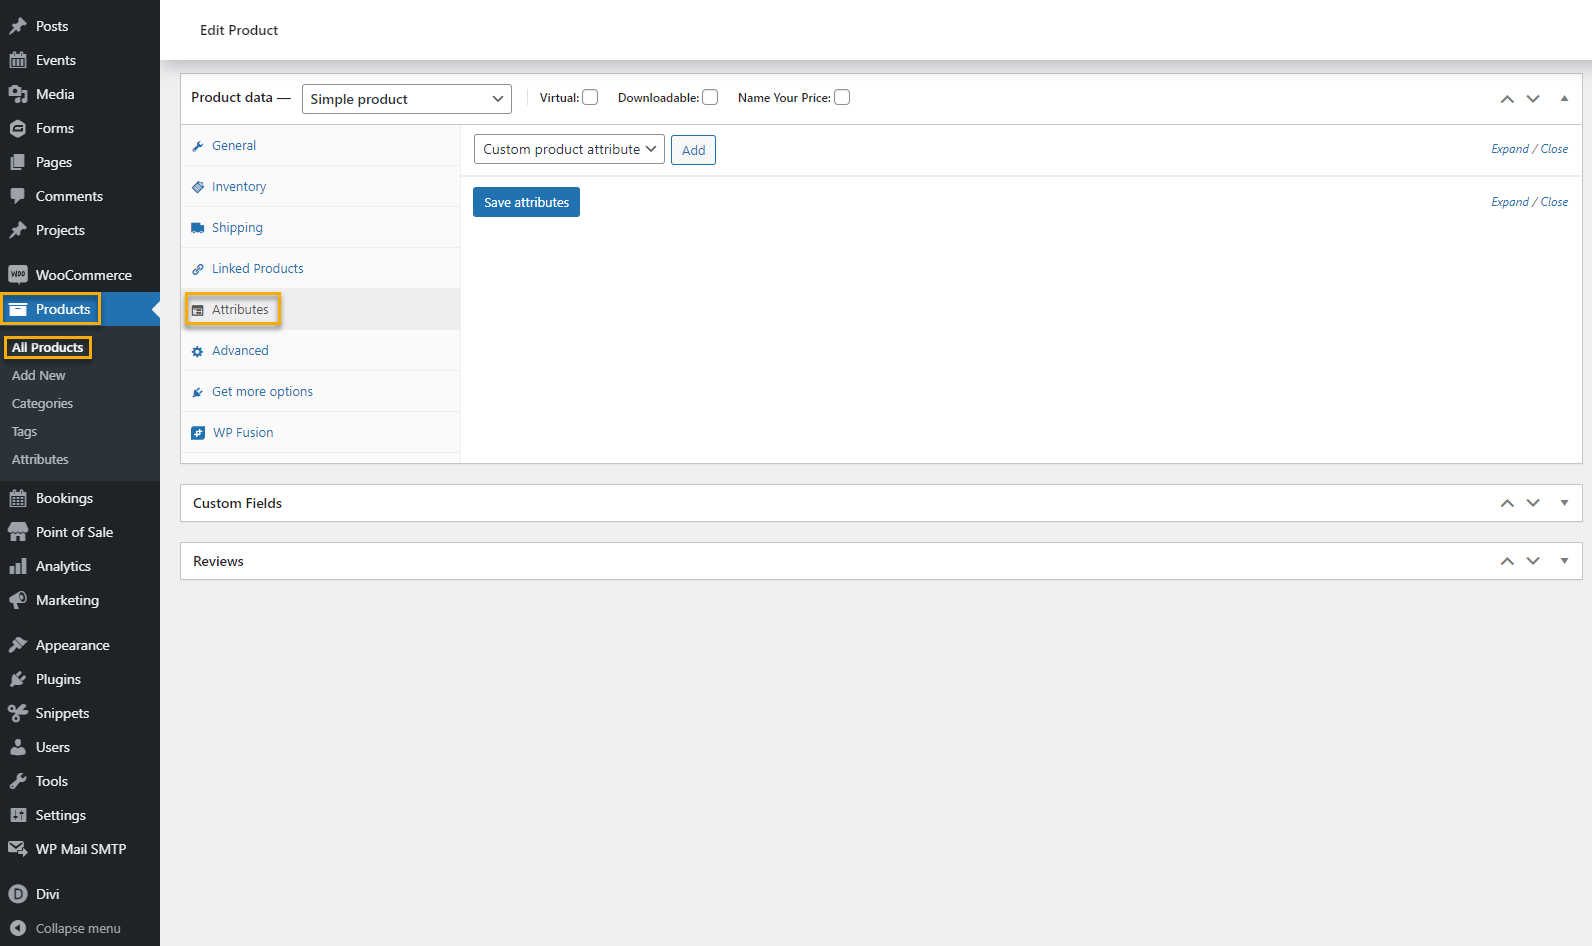
Go to the Products menu item in the Admin menu, and select the desired Product from the overview (not shown in the image below). Once you open the Product edit page, scroll down to the WooCommerce product data box, and select the Attributes tab.
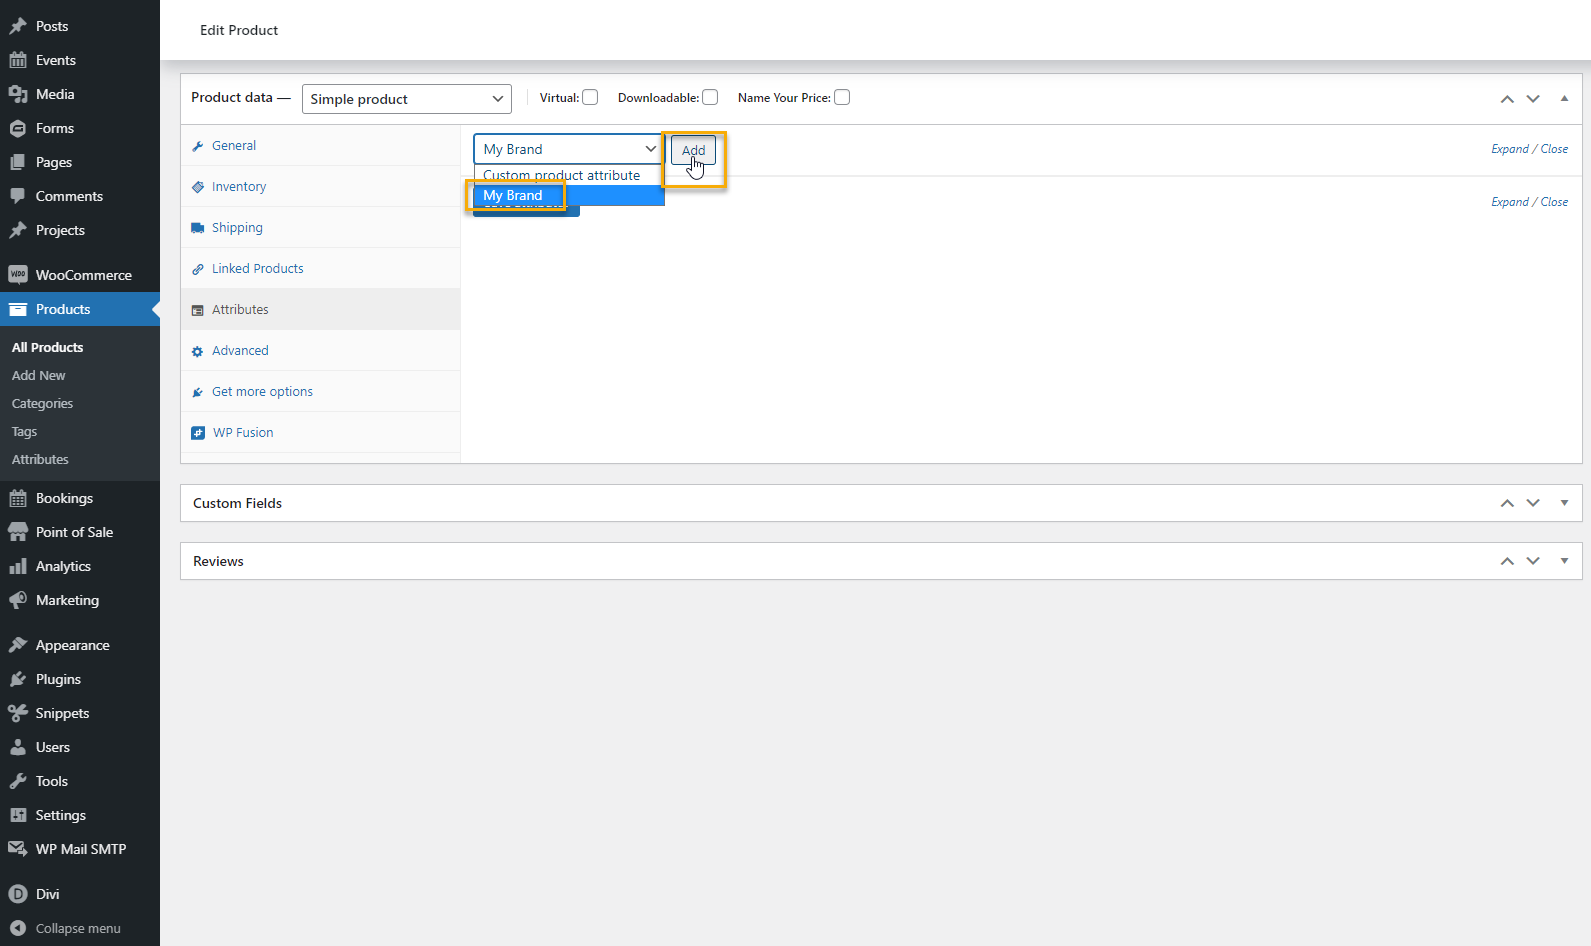
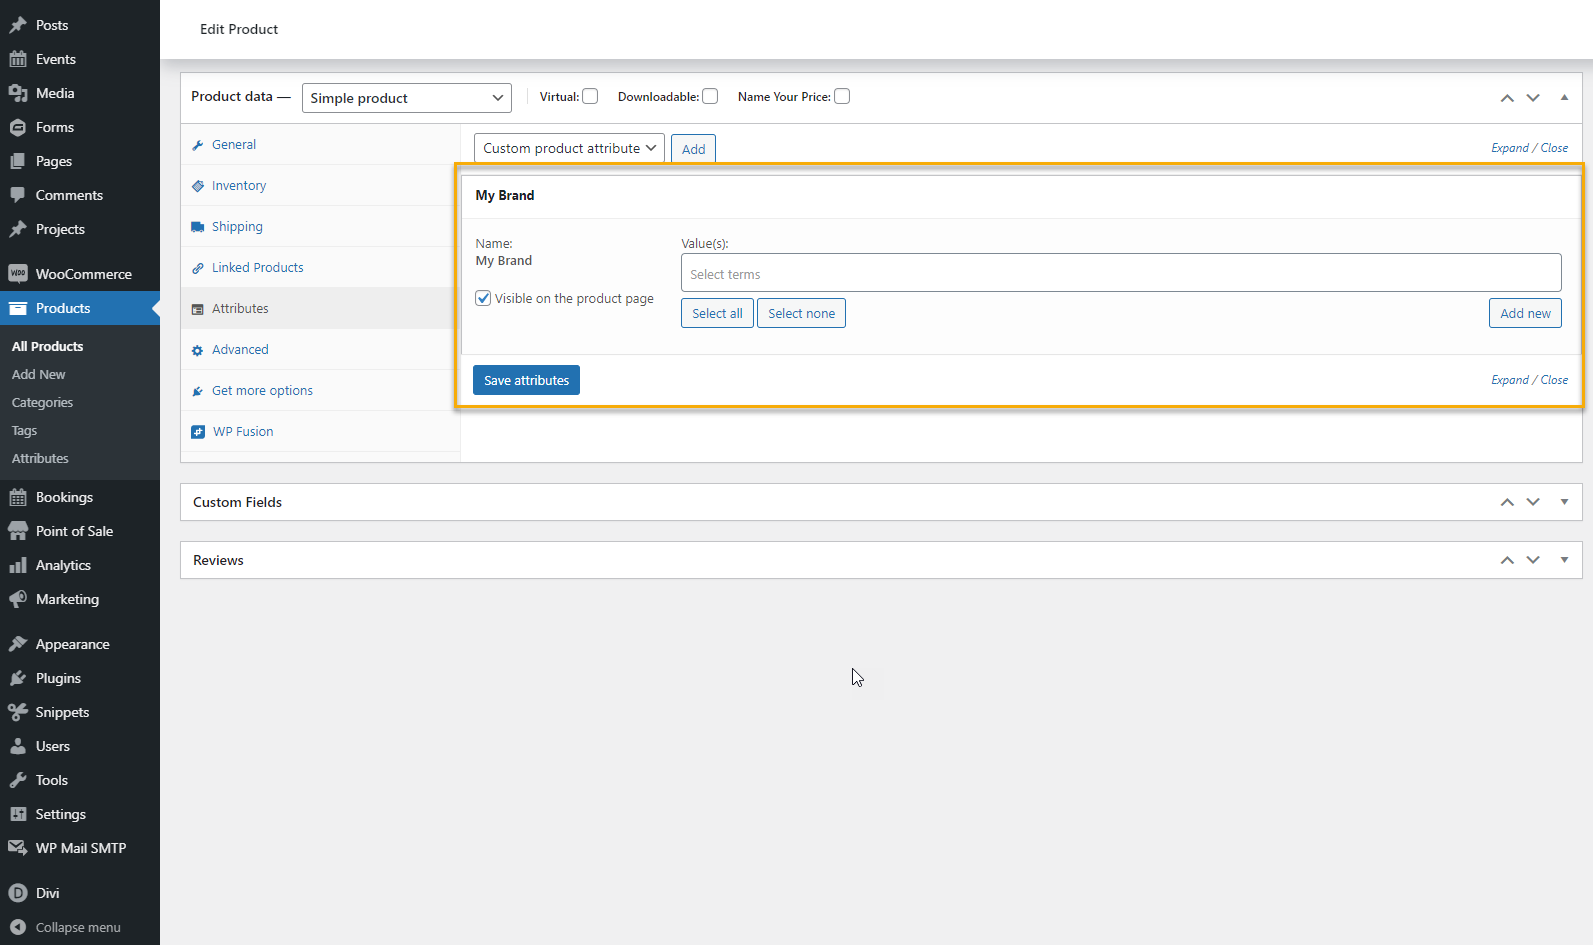
Click on the dropdown box that says Custom Product attribute and select your Brand. Then, click the Add button.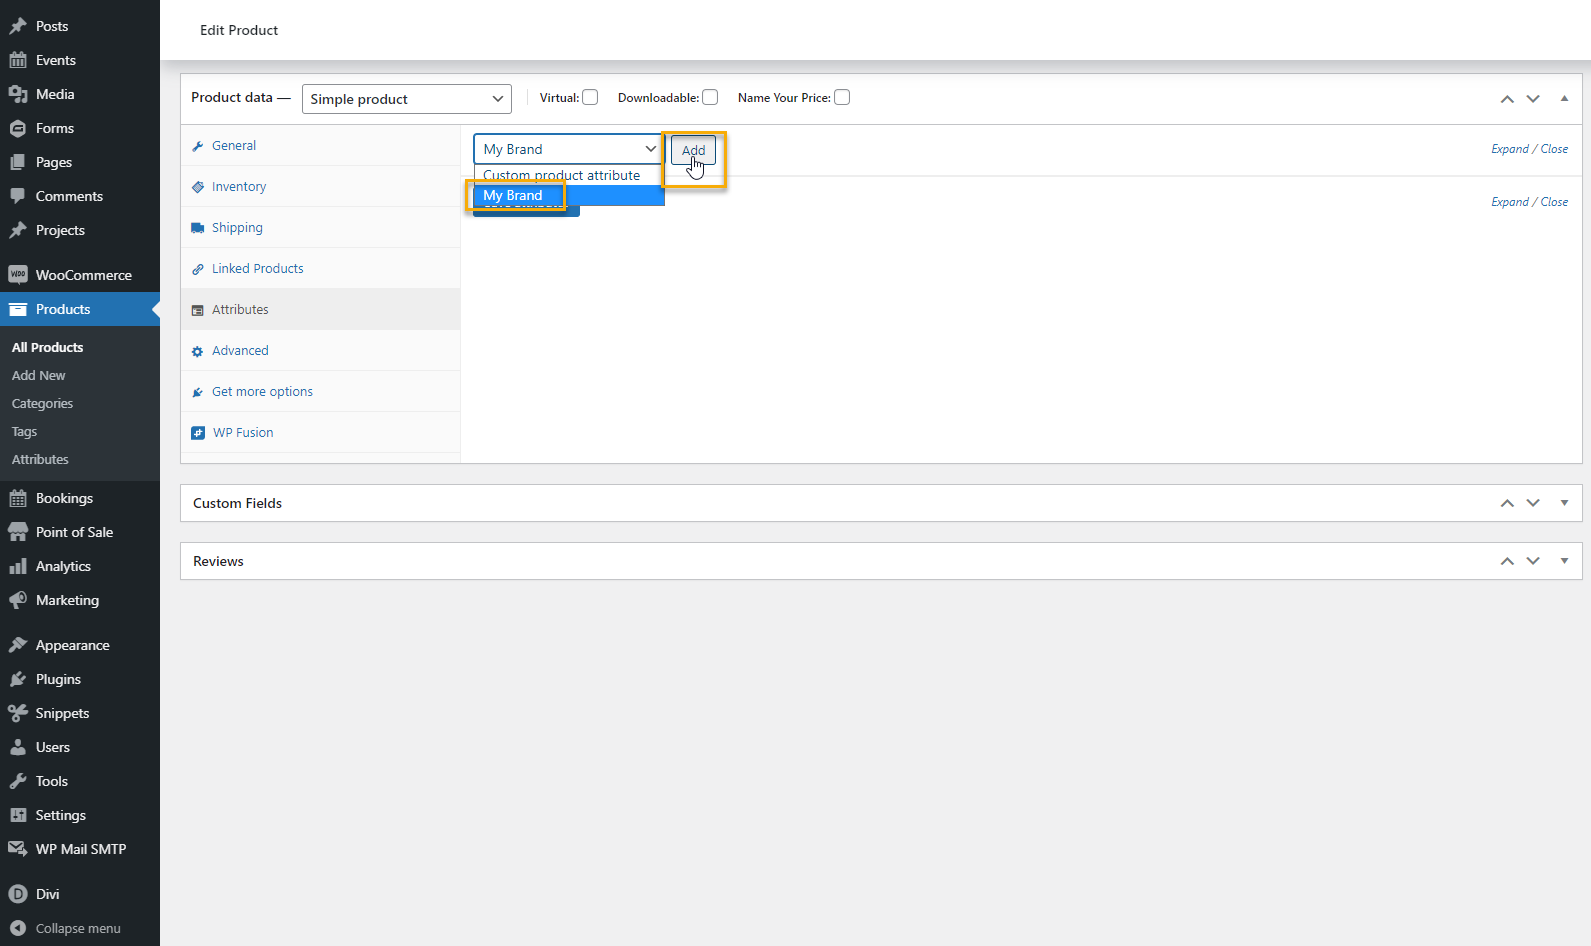
-
The Brand will be added and some additional options will appear.
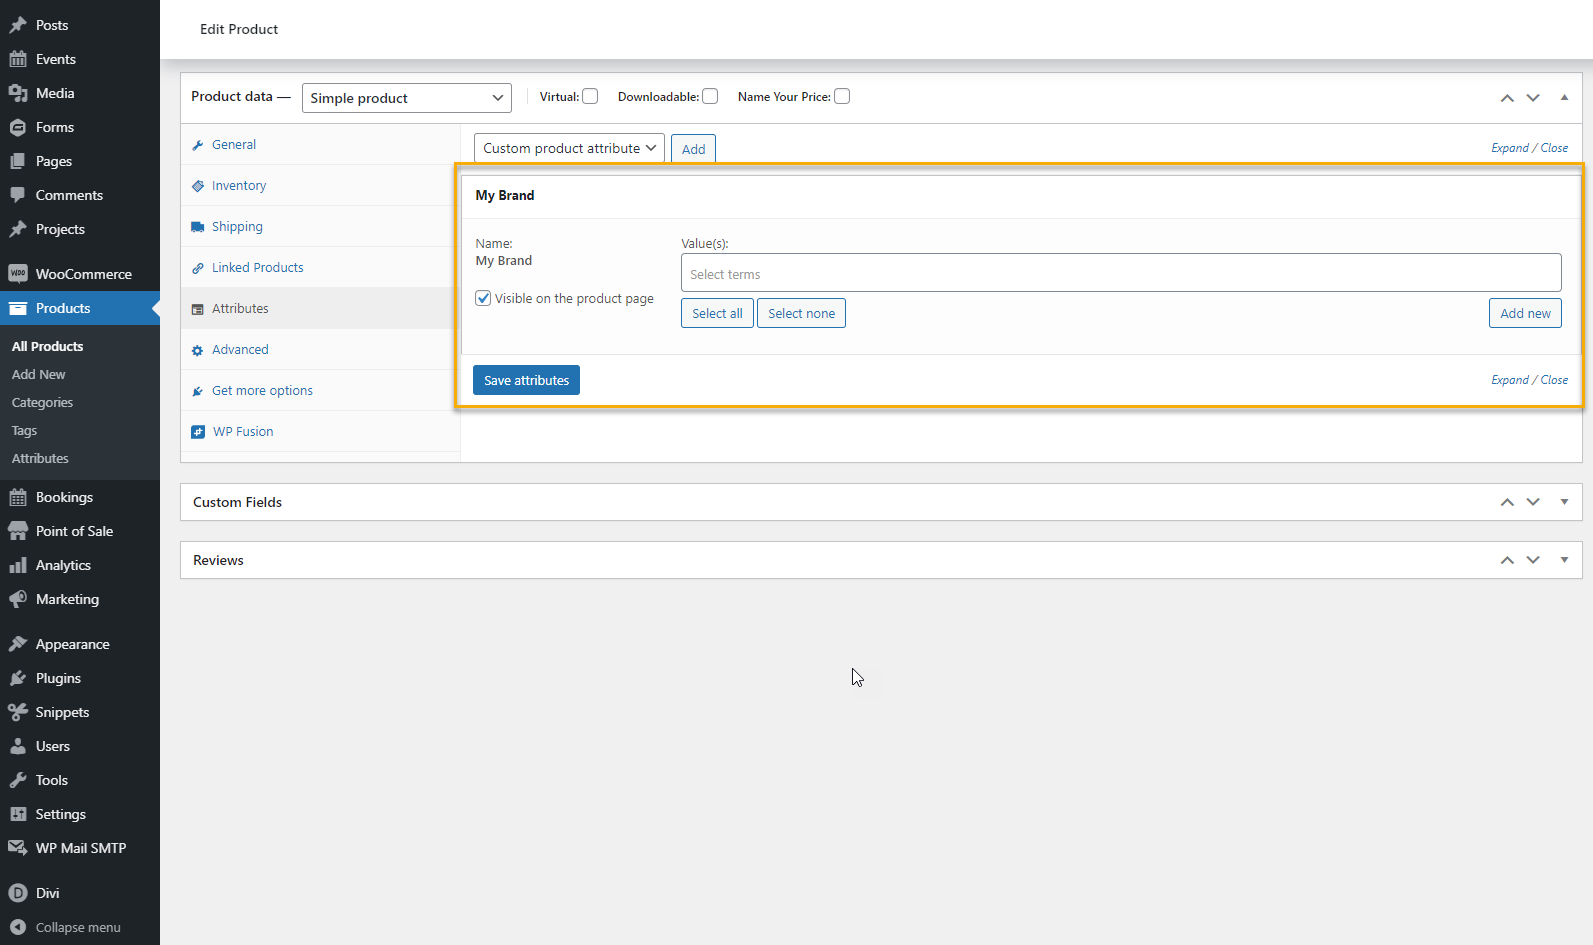
-
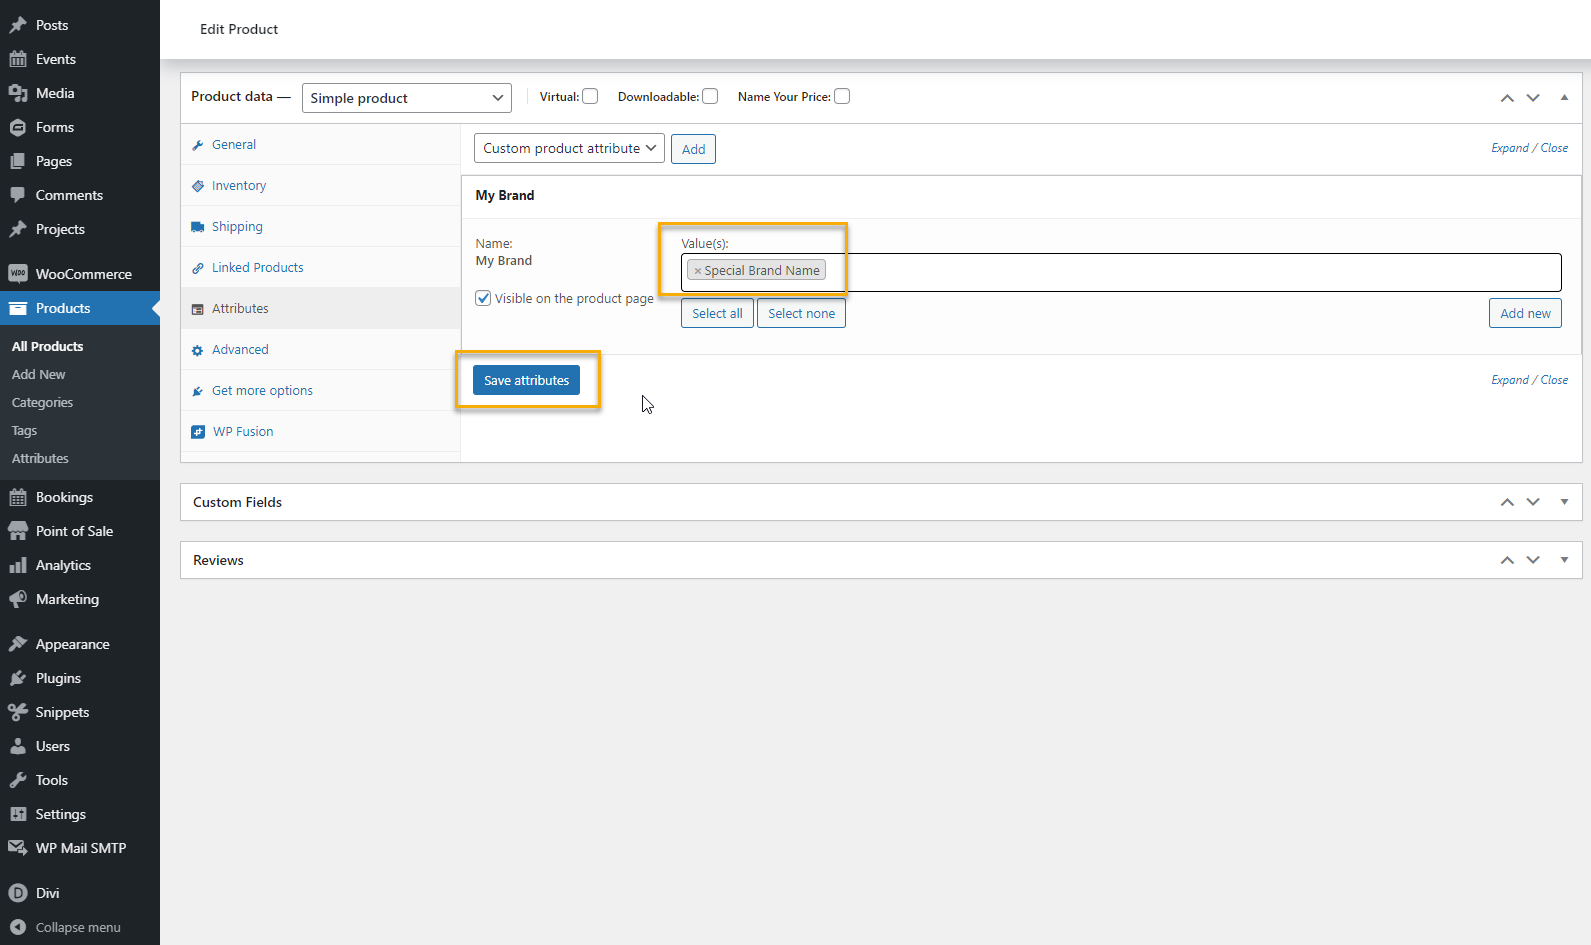
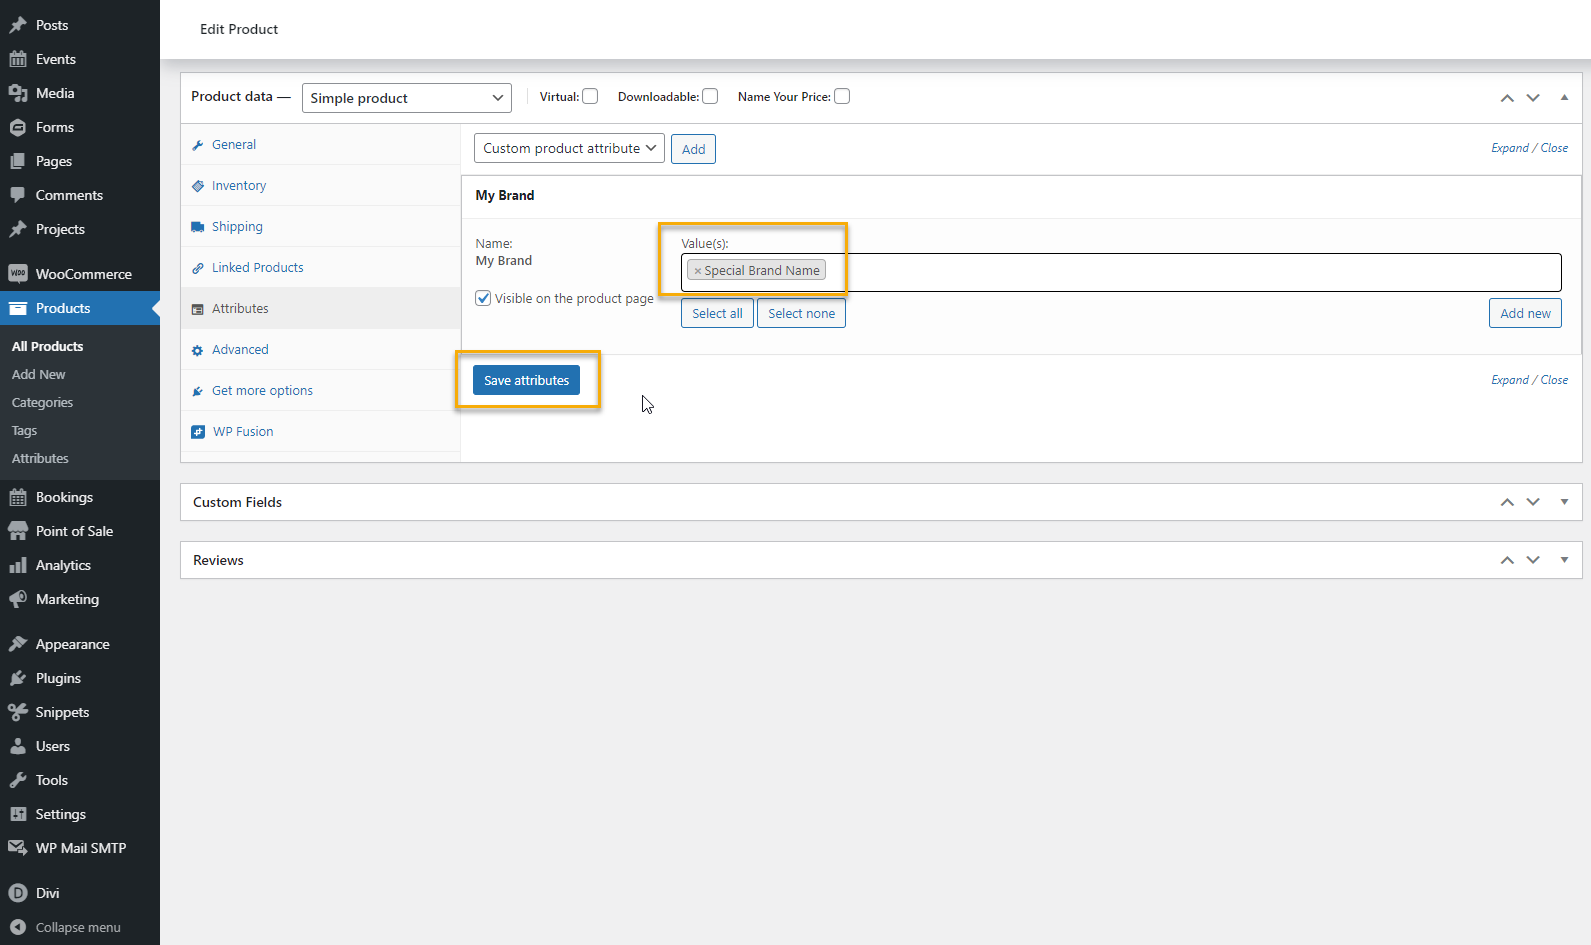
Next, select the brand value. To do so, just click on the empty box below Values. The Brand values you have added will appear. Select the one you want (in this case: Special Brand Name). Click Save Attributes. That will add the Brand attribute to the product page.
-
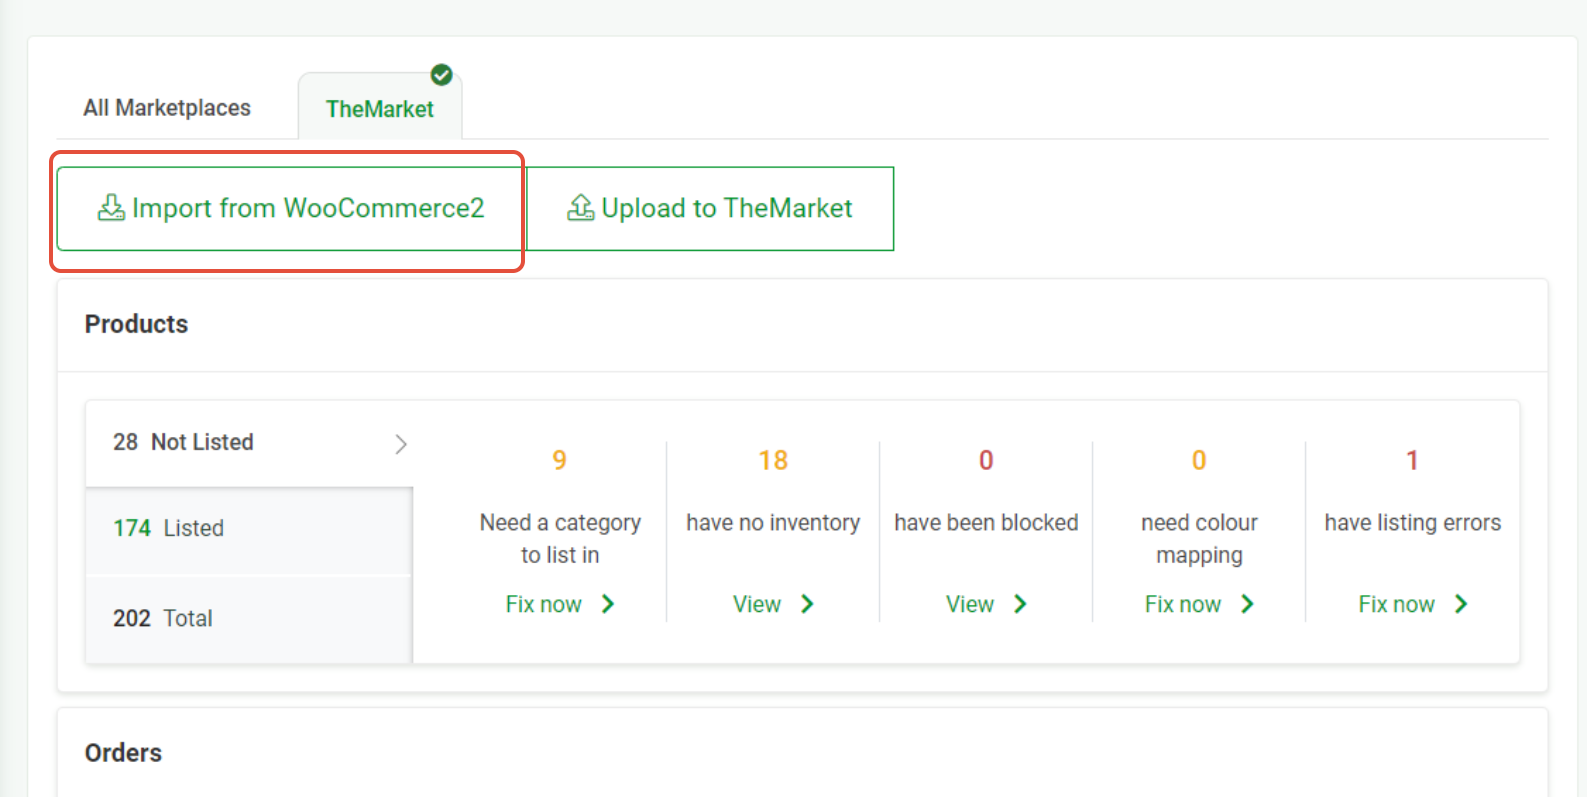
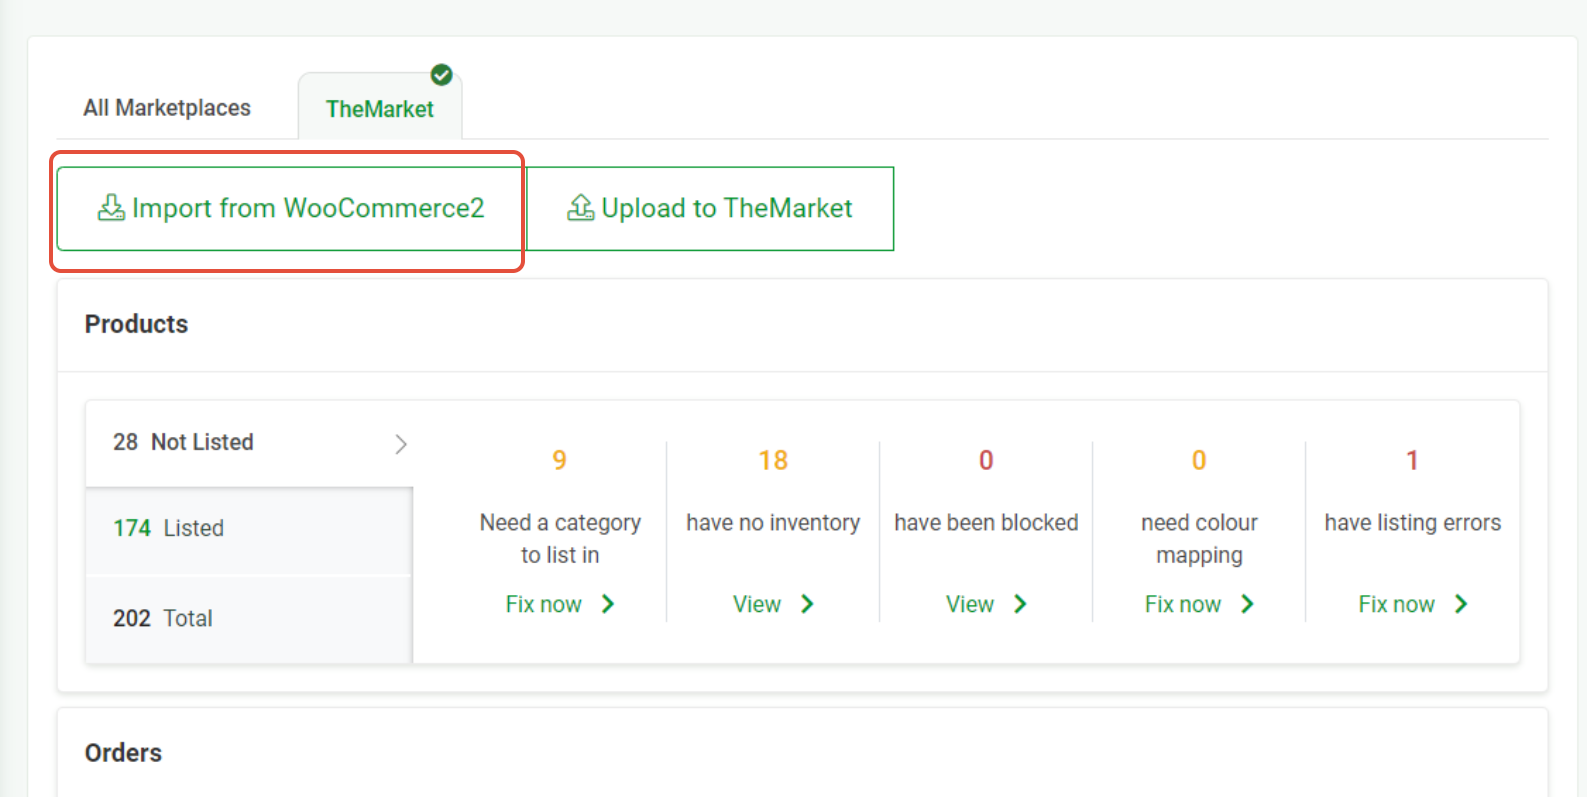
Click the Update button at the top of the Product editing screen to save the new settings. Once complete, return to the Omnivore dashboard and click on the Import from WooCommerce button.
 Tip:
Tip: