
Spelling / Grammar checker
Please ensure that you use a spelling and grammar checker as Freshdesk only includes a spell checker. There are various free ones available including Grammarly which works well.
Receiving Incoming Tickets
You need to set your status to "Automatic Ticket Assignment On" when you start working.
Click on the Icon in the top right corner of Freshdesk to toggle your status
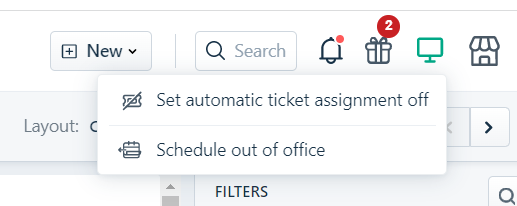
The green icon means you are available and will receive incoming tickets. The red icon means you are unavailable so you will not receive tickets.
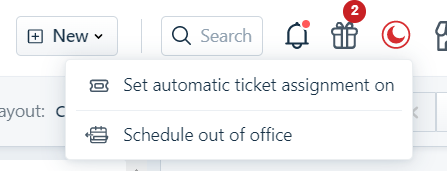
Don't forget to make yourself Unavailable when you finish working.
New Enquiries
Assign any enquiry from retailers without an installation to Jo.
Tickets from Accounts in Setup Mode / Marketplace in Setup Mode
Assign any tickets to Jo if the account is in setup mode, or if the specific marketplace the retailer is asking about is in setup mode (even if other marketplaces are live).
Linking New Contacts to a Retailer
When a retailer submits their first ticket, or uses an email address that does not already exist in Freshdesk, you must link the contact to the correct retailer account.
Some contacts may exist across multiple retailer accounts. In these cases, confirm which retailer the enquiry relates to and ensure the ticket is linked to the correct account.
If a ticket is not correctly linked:
It will not appear under the retailer’s account in Freshdesk.
It may not be accessible for future reference as it cannot be located.
Ticket reporting by retailer will be inaccurate.
Incorrectly linked tickets can cause SLA calculation errors and financial risk.
Some Enterprise accounts (e.g. Coles Liquor) operate under specific SLAs.
For this reason, all Coles Liquor tickets must be correctly linked within 15 minutes of the ticket entering your queue and for all other Enterprise accounts, linking must be completed within 30 minutes of the ticket entering your queue, unless you are actively handling a P0 (critical) issue.
You are responsible for checking every ticket to ensure contact details are complete and correctly linked before progressing with the case.
How To Link a Ticket From a New Retailer
Here's an example of a ticket from a new retailer
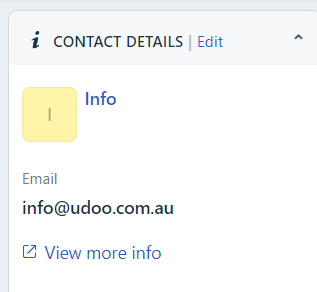
Compared to an existing contact that has been linked to a retailer
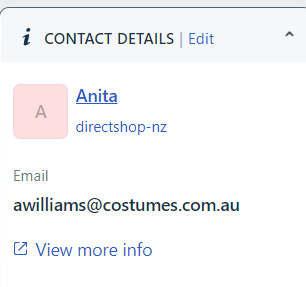
To link a new contact to the retailer click on the View More Info link which will open a new tab. Click on the Edit button in the top left corner which will open another new window.
Scroll down to this section
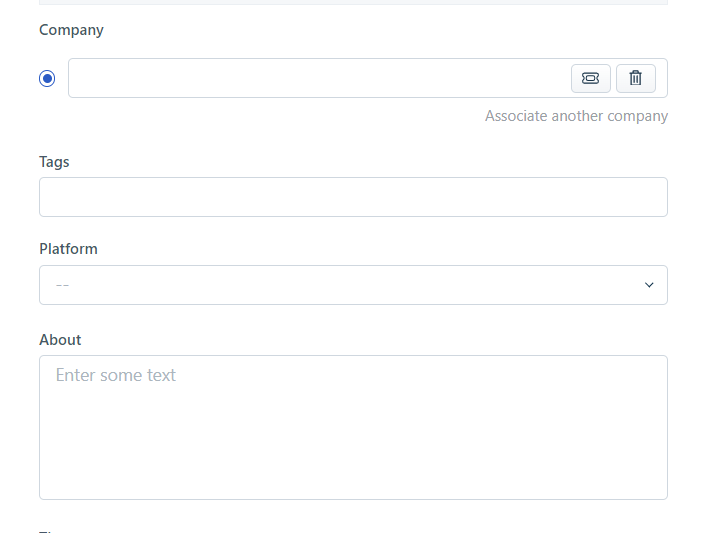
In the About field enter a link to the retailer's dashboard
In the Platform field select the retailer's ecom platform
In the Company field copy / paste the retailer's name from the end of their dashboard URL that you entered in the About field. If the retailer already exists in Freshdesk it will show up and you can select it, otherwise click on Add..... to create a new retailer record.
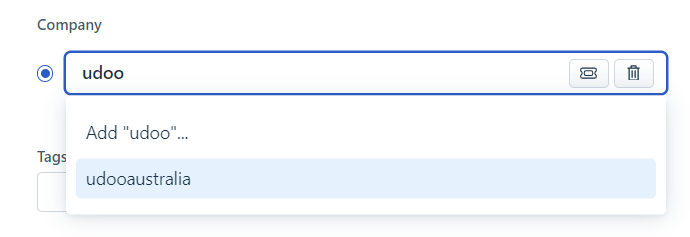
Click Save and you can then close the tab.
How to Reassign a Contact When They Are Linked to Multiple Retailers
If a contact is associated with multiple retailers any ticket will initially link to the default company they are associated with. If the ticket actually relates to different company you must correctly link it.
When you receive a ticket the Contact Details will likely show multiple Omnivore dashboard URLs that the contact is associated with e.g.
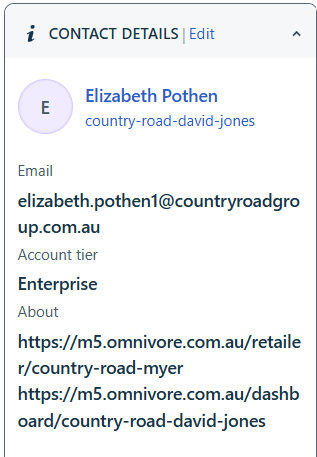
NOTE: Do not assume if you only see one URL here that the contact is only associated with one retailer account. It may be that they have not been linked correctly to other accounts, or this may be the first ticket they are submitting for a new account.
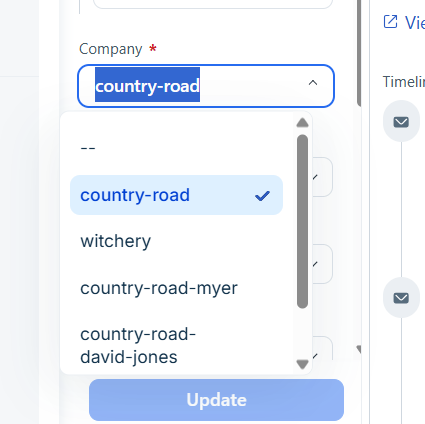
Assuming that the contact is already associated with the account you want to link the ticket to, go to the Company field in the the Ticket Properties column and select the relevant company that the ticket is associated with to link it correctly.
Changing Contact Details on Tickets Submitted by Marketplace Contacts
Tickets submitted by marketplace contacts need to be edited to change the contact details to the retailer's email address. If this isn't done then the ticket isn't linked to the retailer's account and cannot be found, or included in any reports for the retailer.
To change the contact email address on a ticket
- Before changing any details add the original email address the ticket was submitted from as an internal note to the ticket so that you remember to cc them in your reply
- Click on the three dots at the top of the ticket page

- Select "Edit Ticket Details"
- In the window that opens change the Contact email address from the marketplace contact to the retailer
- Click Save
Checking for an Existing Ticket
Before starting work on any ticket, ensure that the retailer doesn't already have an open ticket for the issue.
Verify the retailer's account, not just the email address, and check at a company level using the company link associated with the contact.
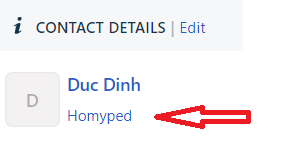
Clicking that link will take you to an overall company view. Once there, navigate to the Tickets tab to access all tickets submitted by any contact associated with the company.
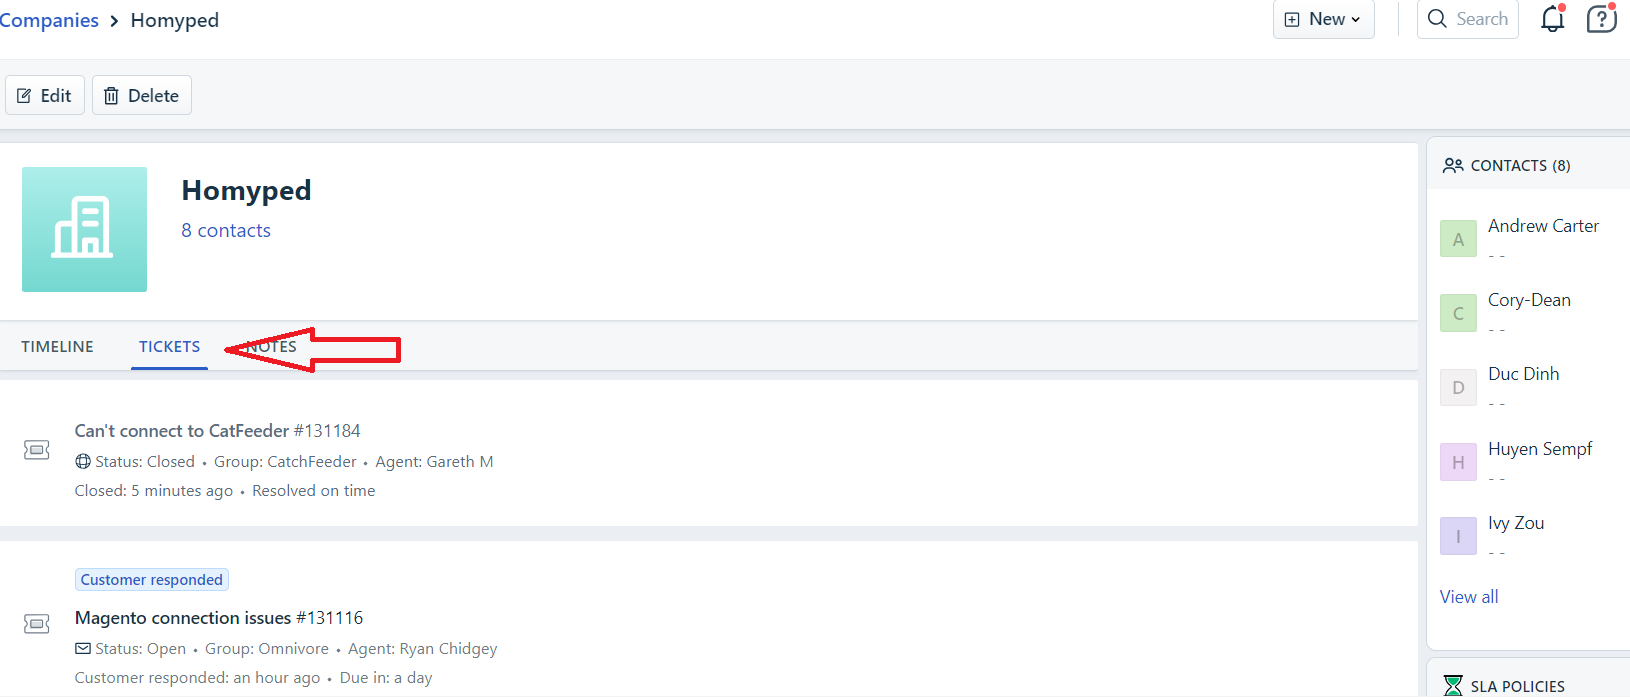
If there is an already open ticket for the same issue, merge your new ticket into it. Refer to the subsequent Merge section for guidance if needed.
Ticket Titles
Retailers will often submit tickets with generic titles such as "Help Needed", marketplaces will submit tickets with generic titles and tickets generated from chat sessions outside support hours will have a generic title of "Conversation with x".
All ticket titles need to be edited to reflect the issue being reported. That way if you need to look back at a retailer's account to find an old ticket you can easily see what each ticket is about without having to open multiple tickets to see if they're relevant simply because the title doesn't state the issue.
Ticket Assignment and Triage
Tickets are assigned based on multiple conditions including prioritising tickets to the emergency email address or from Enterprise retailers first, SLA response times for the ticket / marketplace, everyone's Open ticket numbers etc.
You are responsible for triaging the tickets coming into your own queue. Please ensure you do the following on all tickets:
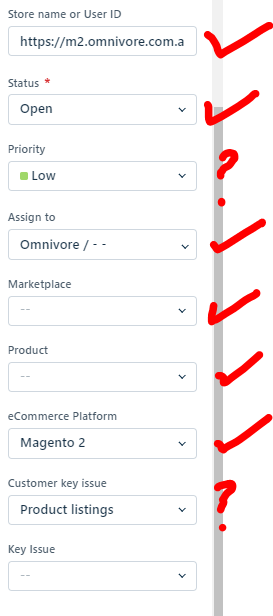
- Set the priority.
- Categorise the ticket as much as possible. See here ->
- Store URL
- Group is correct
- Marketplace
- Product
- Platform
- Customer key issue
- If this is the retailer's first ticket ensure you link the contact up to the retailer (see below)
- Ensure that the title is edited to reflect the ticket issue. Do not leave titles that just say "Help Needed", "Contact Me" etc. The title should be edited so that if anyone needs to revisit the ticket in the future it's easy to identify what the ticket is about.
- If the ticket has been submitted by a marketplace contact in relation to a retailer's account ensure that you edit the contact details to the retailer's email address. This ensures that the ticket is associated with the retailer and can be found again.
Ensure that you review all new tickets first thing in the morning in the event that they need to go to Scrum.
How to prioritise a Support related ticket
Everyone's tickets are equally important, but some are more important than others. Here is some advice on how to discern an emergency from a non-emergency:
Severity 1 (urgent)
A problem that severely impacts the use of the software in a live environment (such as loss of data or complete malfunction of a live system). The situation prevents the retailer from using the software and there is no procedural workaround available.Severity 2 (high)
A problem where the software is functioning but the functions in a live environment are severely reduced. The situation has a high impact on parts of the retailer’s business operations and there is no procedural workaround available.
Any tickets where an oops error is being displayed.Tickets from Enterprise retailers are set to high by default. They should be reviewed and the priority revised as needed when they are received.Severity 3 (medium)
A problem that involves partial, non-critical loss of use of the software in a live environment. There is a medium-to-low impact on the retailer’s business, but the business continues to function, with or without a procedural workaround.
Tickets from Account Managed retailers are set to medium by default. They should be reviewed and the priority revised as needed when they are received.Severity 4 (low)
A question regarding general software usage in a live environment where there is low-to-no impact on the retailer’s business and the performance or functionality of the system. The business continues to function, with or without a procedural workaround. Any questions where the installation is still in setup mode.
Process for Manually Splitting a ticket
Retailers often add multiple issues into one ticket. These tickets need to be split so that
- Threads do not get too long and are hard to follow.
- Ticket volume numbers and ticket type information is correct in Freshdesk.
Reasons to split a ticket:
- The retailer has asked multiple questions relating to different issues - split to a ticket for each issue.
- The retailer has asked multiple questions relating to different marketplaces - split to a ticket for each marketplace.
An easy rule of thumb to apply to new tickets is to think of how you would categorise the ticket when you're closing it. Unless all questions can be categorised under the same marketplace, Key Issue and Sub-Issue you need to split the ticket.
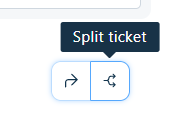
To split a ticket click on the Split Ticket icon in the ticket you want to split
- Change the title to a new appropriate one.
- If required, ensure you delete all text relating to an old thread or other questions
- Put a link to the old ticket in a private note.
- Add dashboard URL link and ecom platform from the original ticket.
- Categorise it as best you can.
Replies on Tickets Closed for More Than 7 Days Split to a New Ticket
If a ticket has been closed for more than 7 days and the retailer replies, the reply will automatically be split into a new ticket by the system.
The new ticket will have the title "Reopened ticket reply from {{ticket.id}}", where {{ticket.id}} is the ticket number of the original ticket.
The old ticket will have an internal note stating, "Latest reply split to new ticket due to being closed for 7+ days."
For the new ticket, ensure the title is updated to reflect the issue, and tidy up the description by deleting any old or non-relevant text before replying to the retailer.
Dealing with tickets generated from an incoming phone call
If a retailer calls and leaves a phone message it will generate a ticket which will drop into the UAQ. The ticket will be assigned to an agent as normal.
There will be a link in the ticket to listen to the message. Depending on the message there may be several possible outcomes:
- The retailer leaves a message for a non-support person - assign the ticket to that person and send them a Slack message to let them know.
- The retailer is enquiring about using Omnivore and doesn't have an install with us - assign the ticket to Fern as you would with any other new enquiry type ticket and send her a Slack message.
- The retailer is calling with regards to an existing support issue - merge the ticket into the relevant existing ticket. If the message is requesting a callback refer to the Support Guidelines to determine whether or not they are eligible for a callback. If not, then acknowledge the call via the ticket and continue to deal with the issue that way.
- The retailer has left a generic "I need help" type message, they have an install with us, but there's nothing in the message to suggest they're calling about an existing issue. Reply to the retailer via the ticket acknowledging the phone call and asking for more details on the issue so that you can assist.
- No message was left. Use the "Voicemail - call hang up" scenario to close the ticket out.
Merging Tickets
Sometimes retailers will submit multiple tickets, or they will submit a ticket as well as open a chat session for the same issue. If that happens the more recent replies need to be merged into the original ticket so that there is only one live ticket being worked on.
To merge the later replies:
- Go to the ticket you want to merge
- Click the Merge button at the top of the screen

- A new screen will open
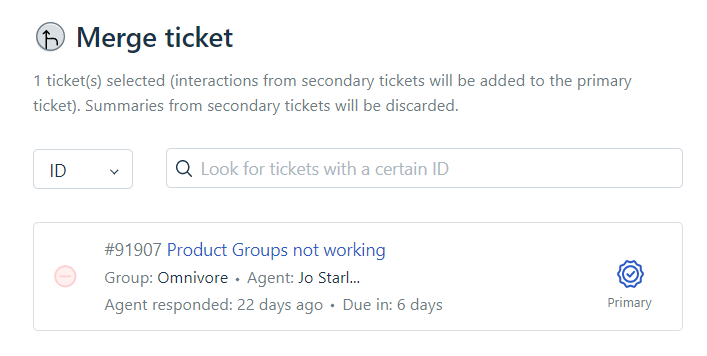
- Change the dropdown box to show ID and enter the ticket number that you want to merge the new reply into
- Ensure that the old ticket you want to merge into is showing as the primary ticket
- Click the Continue button
Points to note:
- The Merge action cannot be undone. Ensure you are merging the correct tickets.
- Ensure the ticket you are merging into is not closed.
DO NOT merge new replies or tickets into closed tickets. If a retailer submits a new ticket that is a continuation of an older closed ticket then the new ticket should not be merged. It should be treated as a new ticket and a note added with a link to any other old closed tickets that may be relevant. - DO NOT merge onboarding tickets.
Any tickets for retailers that are being onboarded should be passed to the person handling the onboarding as they come in.
Escalating a Ticket
- In the first instance, tickets should be assigned to 'Level 1' i.e. not Bill.
- Triage the ticket and follow the general processes for troubleshooting etc.
- If you have been working on a ticket and can't go any further with it, ask for assistance in Slack, or use the Assistance Request canned response and notify Jo to request assistance and / or review.
- If you cannot resolve the ticket this way, or need it looked at sooner escalate the ticket to 'Level 2' (i.e. Bill). Bill will assist with the ticket, but you are responsible for managing the ticket and comms with the retailer unless otherwise agreed and the ticket is assigned to someone else. Set ticket to 'Waiting on L2 Support'.
- If the ticket can't be solved by Support, then bring it to Scrum - the likely outcome is that the ticket will go into the Dev Fairy or a Dev can have an initial look.
NOTE: If you do need help with a ticket let the customer know so that we manage their expectations around timings. It's better to say something like "I need to get some help from one of our other Support Specialists to assist with your issue/request. It may take a couple of days before I can get back to you" rather than not saying anything.
Ticket Status
As tickets change from Open to any other status it creates a free slot in your queue for a new ticket to be given out.
You need to ensure that the only tickets showing a status of Open are ones that have either just arrived in your queue and which you have not yet responded to, or ones that you are actively working on and require a response.
All other tickets should be set to Waiting on Customer, Waiting on DF, On Hold etc. as appropriate.
Do not leave tickets with an Open status if they are not being actively worked on.
Ticket Review
It's recommended that you try and review your tickets on a daily basis if possible. At the very minimum, you should go through all of your unresolved tickets at least once a week and close out any tickets that are more than 7 days old.
Tickets should not go for longer than 7 days without an update of some sort on them.
If you have not heard back from a retailer or a third party to a request for more information then send a follow-up message asking for the required information again.
Be proactive and manage the ticket through to resolution.
Closing Tickets
The system will automatically send a follow-up email reminder to any retailer that has not replied to a ticket after 5 days.
If the retailer has still not replied after 7 days the ticket should be closed using the canned response called "Do you still require assistance".
Guidelines for Re-assigning Tickets
Situations where you can re-assign a ticket if needed
- Onboarding ticket
- Too many tickets/can't get to it - ask in Product Support to see who can take it
- If going to be away for more than a few days - check with the Team Leader first what process to follow as it will depend on several factors
If re-assigning to another support member ensure you check with them first. Do not just re-assign tickets without asking.
Add a note for the next support person - summarise key points/what's happened e.g. things you've tried already/what to do next/whatever you're waiting on. Make mention of urgency. Assign based on specialty, existing ticket volume etc.
Rosters - UAQ and Standard
- Use Slack to let everyone know when you start and finish each day.
- If you are rostered on to the UAQ it takes priority over other tasks.
- Except for emergencies, the expectation is that you work a full UAQ shift. The roster is done a month in advance which should be enough notice so appointments etc can be arranged when you're not on UAQ. If for any reason you are unable to cover your UAQ shift notify The Team Leader by direct message immediately. In their absence please notify Fern.
- If an agent will be unavailable for any reason during their shift—e.g. stepping out briefly, attending an appointment, or joining a meeting (note, these are not exhaustive examples)—they must notify the Support Manager in advance with the times they’ll be unavailable and the reason. If the Support Manager is unavailable, they should notify Ivan instead. Once approval is given, the agent must also post in Slack when they leave and when they return so the team is aware of who is available and actively working.
- If someone is rostered onto the UAQ then the UAQ is when they will be available and standard hours do not apply. e.g. if someone is on morning UAQ they will likely be finishing around 4pm, or if they are on afternoon UAQ they will likely be starting around 10am.